
Unlike pageview or destination tracking, by default, there is no way to set up link click tracking in the Google Analytics platform itself. However, in this handy guide, we cover the different ways you can get it working.
Can You Track Link Clicks in Google Analytics?
Yes, Google Analytics has the capability to track link clicks through ‘event’ tracking. This is made possible from data fed into the Analytics platform, you just need the right tools for the job. You can track link clicks via plugins, hardcoding or via Google Tag Manager.
Say Hello to Events
To track link clicks in Google Analytics, you need to track them as ‘events’. Events are specifically designed to capture different user actions on a website, whether it be filling out a form, watching a video, or clicking a link.
You then have the option to track these events as ‘Goals’ in Analytics. However, we would only ever recommend setting goals for events that you personally count as hard conversions (e.g., a ‘quote request’ form submission).
Tracking link clicks as events can be achieved by three main methods:
- Plugins
- Hardcode the event using script tags (i.e. get a developer to do it)
- Google Tag Manager
1. Tracking Link Clicks via Plugins
It’s possible to track link clicks via plugins for your CMS; a few examples being ‘Gravitate Event Tracking’ and ‘Track Everything’ (WordPress specifically). These will need to be put in place by a developer, as plugins can cause a lot of problems on your website if you don’t know what you’re doing!
Alongside them requiring a developer, we would advise against plugins for the following reasons:
- They are not compatible with every site or platform (most are WP)
- Too many plugins can be detrimental
- They can slow down your site
- They can produce security vulnerabilities if not adequately managed
- There can be incompatibilities with other plugins
- Your control is limited as plugins are from third parties – i.e. someone else is developing it. This means that you may not be able to achieve what you want from your tracking.
2. Tracking Link Clicks via Hardcoding Events
If you have easy access to a developer, then hardcoding your link click event tracking is another option. This is much more of a manual process, and we would no longer recommend for the following reasons:
- It’s time consuming – hardcoding your link tracking takes time
- You have to update the tracking all the time – for new links added/links that have changed
- You can’t DIY – you will always need a developer to help you make any changes
For in-depth information on how to implement hard-coded events, take a look at Google’s developer guide.
As far as we’re concerned, your third choice is the by far the best. At MRS, we’re big Google Tag Manager advocates (yes, we’re slightly biased) – here’s why:
Why We Would Recommend Tracking Clicks Via Google Tag Manager
Google Tag Manager allows you to have complete control over your tracking. Best of all, apart from initial set up, there are no devs required. Thanks to its simple, user-friendly interface, most marketers can get to know the basics of Tag Manager.
The platform means you can tailor your tracking rules to be as broad or as specific as you like. Do you want to only track clicks to one page on your site? Or, perhaps you want to track clicks of all buttons on your site.
In our opinion, the only disadvantage of Google Tag Manager is that it can be daunting the first time you give it a try. Fortunately, we’ve put together a step–by–step guide for tracking link clicks on your site.
3. Tracking Link Clicks via Google Tag Manager
If you are completely new to Google Tag Manager, it’s worth having basic understanding of the platform and how it works before you read any further. We would recommend taking a look at one of the following reputable guides:
Moz – An Introduction to Google Tag Manager
Google – Tag Manager Overview
HubSpot – Google Tag Manager: A Simple Tutorial
The following steps presume you have created a new Tag Manager Container and have already added the Google Tag Manager snippet to your website. If you need guidance with this step, take a look at this video via Google:
1) Create a Google Analytics Variable
To make sure any events you create via Tag Manager connect to your Analytics correctly, you first must make sure you create a User Defined Variable for your Google Analytics account. Fortunately, this is a very simple step. (If you are already running your Google Analytics pageview tracking through Google Tag Manager then this will already exist).
Please note that setting up Google Analytics pageview tracking and a Google Analytics user defined variable via Google Tag Manager are two different things. If you already have Google Analytics tracking hardcoded on your site, you only need to set up a Google Analytics variable – this will not impact your hardcoded tracking.
Firstly, navigate to your Google Analytics account’s property settings, and click onto your ‘Tracking Info’ settings as below.
In here, you will find your property’s tracking ID. You will need to copy this in preparation to place this into the variable you are about to create.
In Tag Manager, click on ‘Variables’ in your main menu and then ‘New’. You want to select ‘Google Analytics Settings’ under Utilities.
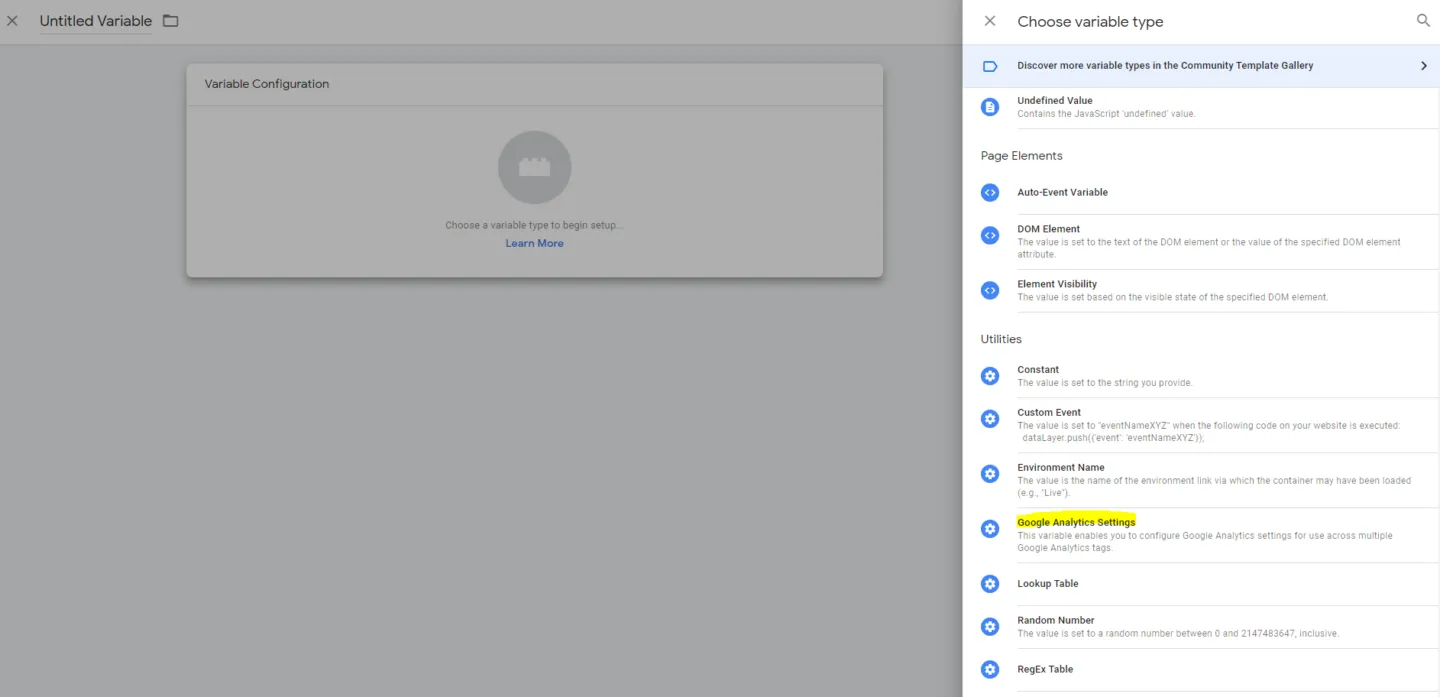
Next, simply paste your Tracking ID into the specified box, give your variable a relevant name like ‘Google Analytics Settings’ and hit save.
2) Enable all click variables
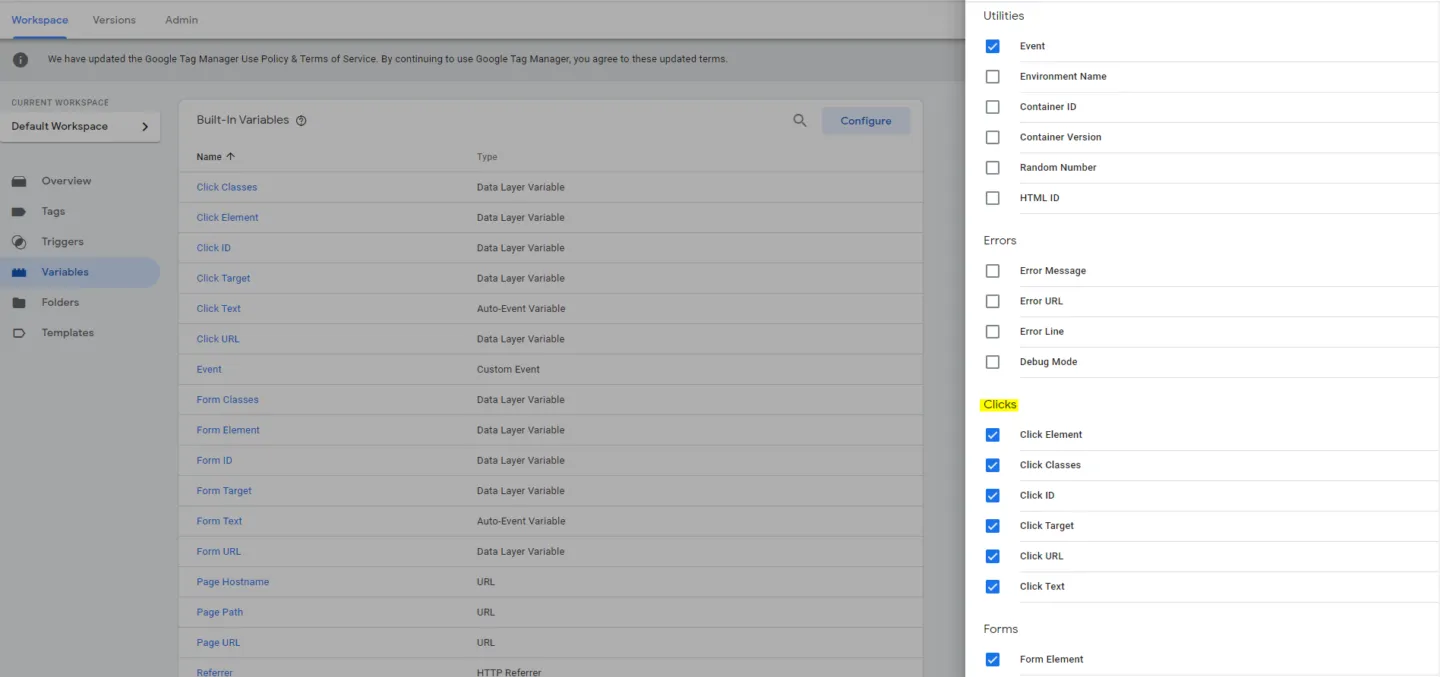
The next step to tracking link clicks via Google Tag Manager is to make sure
all click-related built-in variables are enabled. These need to be ticked to
make them available in your container. Once enabled, they can then be used
within your triggers (explained further along).
To do this, navigate to ‘Variables’ in your left-hand menu and click the
‘Configure’ button at the top right. You need all the ‘Clicks’ variables ticked
and enabled.
3) Setting Up Tracking for Link Clicks
Tracking All Link Clicks
Scenario: You want to track all internal link clicks across your website.
Starting at the most basic link tracking, let’s suppose you want to track clicks of all internal links on your website.
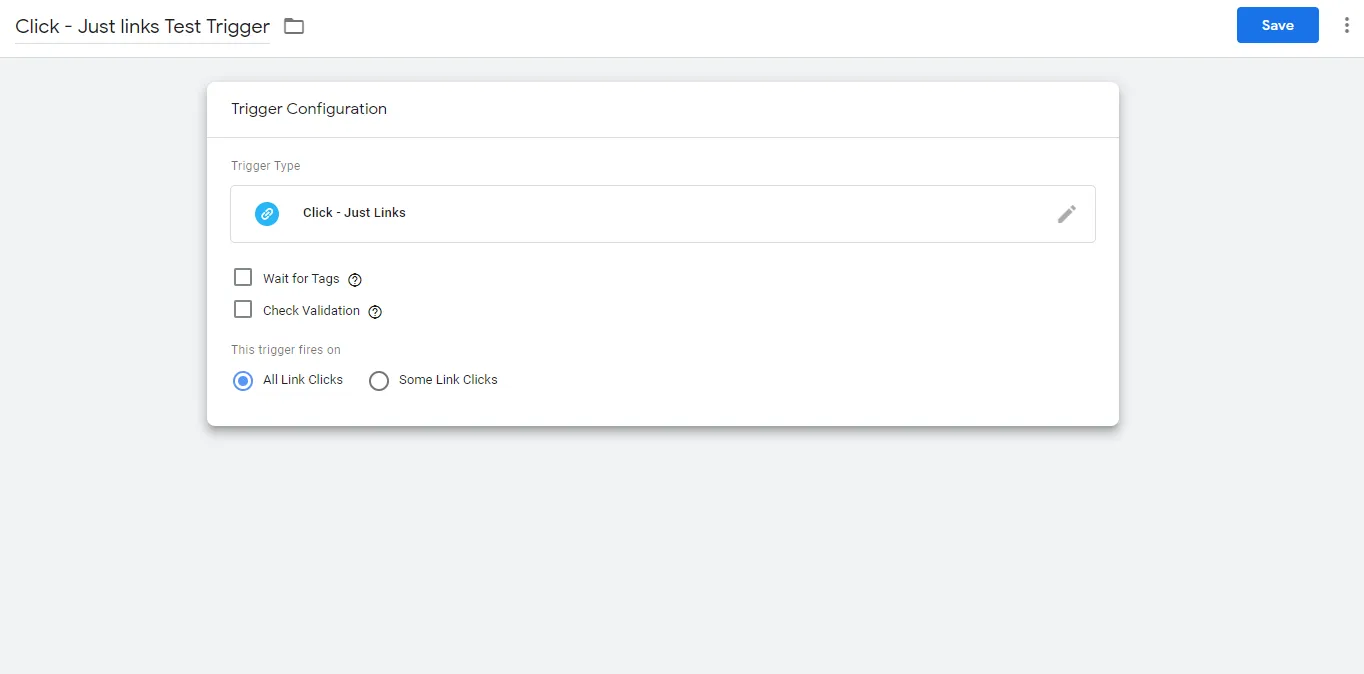
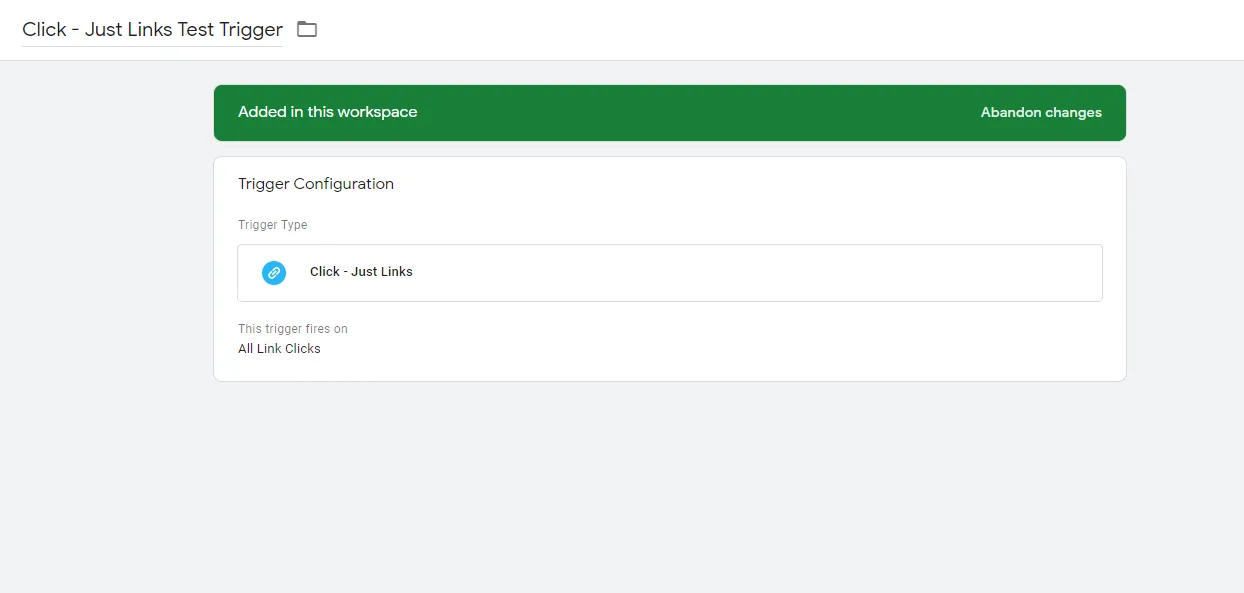
In Tag Manager, your first step would be to create a new ‘Click – Just Links’ Trigger. You would leave your trigger to fire on all link clicks as below.
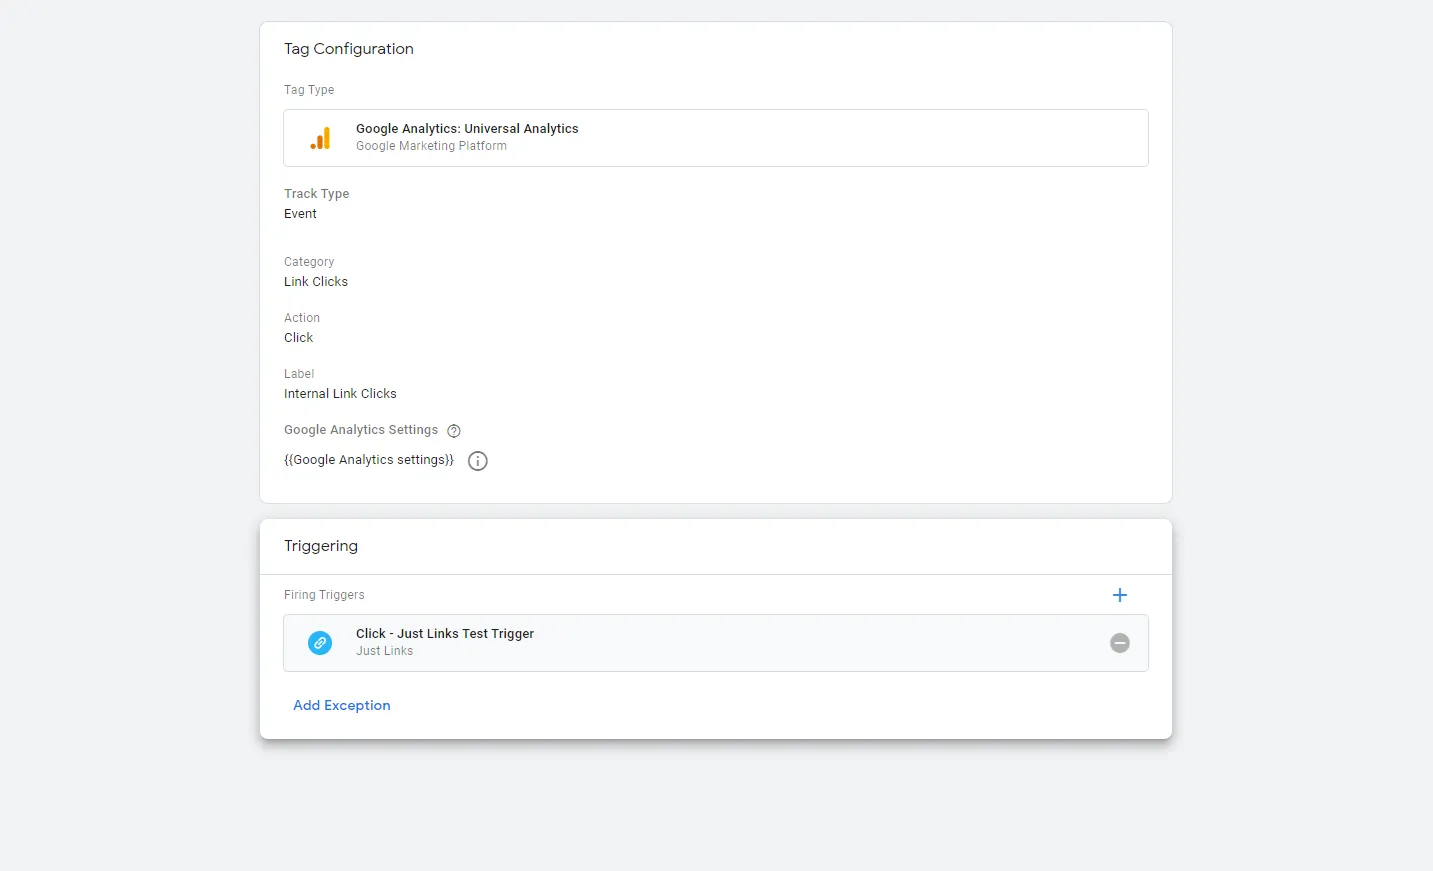
Once you have created your trigger, you next need to create a tag to ensure your clicks are recorded in Google Analytics. To do this, under ‘Tags’, select ‘New,’ and choose the Google Analytics tag type. Next, select ‘Event’ for track type, as all link click tracking is event-based.
Add a descriptive Category, Action and Label – this will help you identify and differentiate your click tracking in Analytics. Finally, select your Google Analytics Settings Variable. Now all that’s left is to add the trigger you just created.
Tracking Specific Link Paths
Scenario: You want to track link clicks that go to a particular URL path / page of the site
Following the same steps as above – creating a relevant trigger and corresponding Google Analytics tag, you can also narrow your tracking down further to track clicks that go to a particular page of your website.
This time, you wouldadd a trigger that is set to fire on some link clicks. To do this, you can use the built-in variable ‘Click URL’. This variable defines a URL behind a link– quite literally, a URL you click.
As you can see, here, we have set the trigger to track link clicks that take the user to /services/ page only on your website.

Important
Bear in mind, this trigger is set to fire on links that contain relative URLs
‘/services/’. If your links contain absolute links e.g.
‘mrs.digital/services/’, then you will need to amend the trigger accordingly.
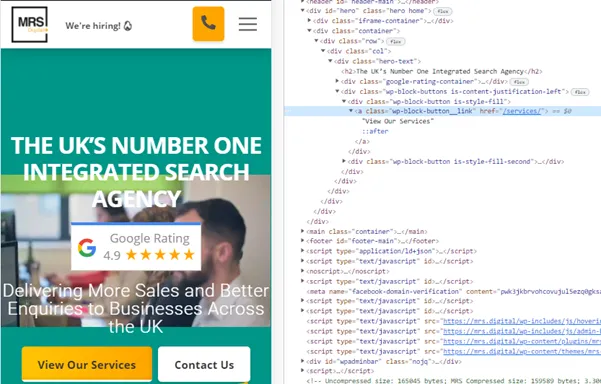
To check whether your links are relative or absolute, you can right click the
button or link, click ‘inspect element’ and check – see below. Here, we can see
this is a relative link, so our trigger will work.
Now that you have mastered tracking clicks to one particular page, if you want to broaden your trigger slightly, you can change your conditions from equals to ‘contains’, ‘starts with’… etc. For instance, if you wanted to track clicks to all pages under the parent /services/, you could change ‘equals’ to ‘contains’.
Tracking One specific link
Scenario: You want to track one specific link located on a specific page
Tracking specific link clicks is easier than you think. For instance – say you wanted to track link clicks to ‘Google Analytics’ on this specific blog post only:
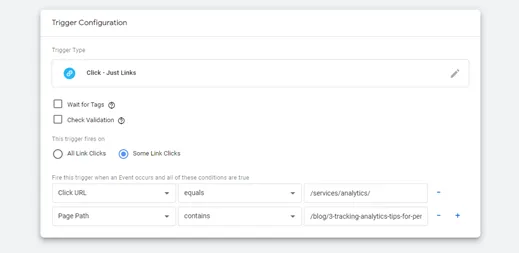
You would once again set your ‘Click URL’ variable to the relevant destination that the link takes the user to. In this case, it’s our Analytics service page (/services/analytics/). However, this time you would also be adding an additional condition to make sure you are only tracking link clicks on this particular blog post – not the whole site.
Using the ‘Page Path’ built-in variable, define the specific blog post as the location where you would like this event to fire. Page path – as described – defines the path of a particular web page (the bit after the domain). So below, we have set our trigger to fire on link clicks that contain /services/analytics/ only on the blog post /blog/3-tracking-analytics-tips-for-periods-of-change-a-covid-19-crisis-article/:
5) Test and Submit Your Changes
Once you have created your triggers and assigned them to event tags, you can next publish your changes on Google Tag Manager to make them live. Now, you can test them in Real Time view in Google Analytics.
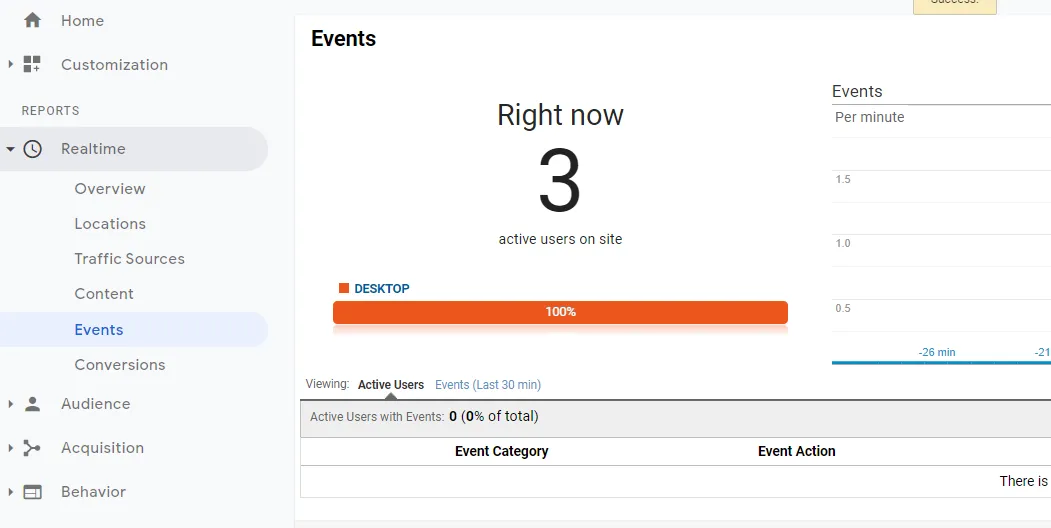
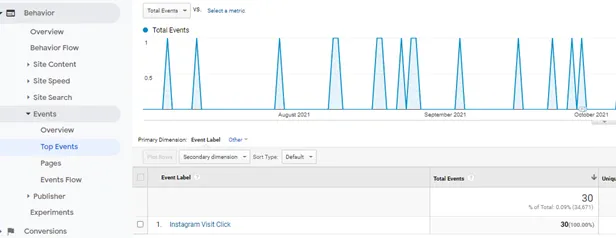
6) Accessing your Link Click Data in Google Analytics
Aside from the Real-Time report, you can view your link click data in Google Analytics ‘Events’ report. You can click on your specific event category, and then filter your event actions and labels using the primary dimension buttons as seen in the screenshot below:
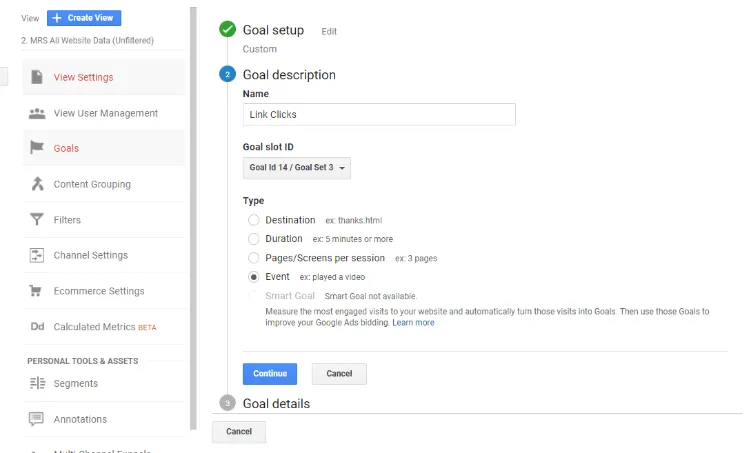
To view your link click events under your ‘Goals’ report in Analytics, you will need to first set these events as goals. This is easier than you would think – simply navigate to Admin, Goals, New Goal and then select a Custom ‘Event’ goal. Here, you will need to match the fields exactly to your event tag/s in Google Tag Manager (Category, Action, Label) – simple.
Pro Tip: [OPTIONAL] Create a Trigger for All Element Clicks or All Link Clicks
When it comes to click tracking, sometimes it can be difficult to work out the best way to differentiate one click from another. There are many options to differentiate, for instance utilising where the link is pointing to, where it comes from, or something altogether more subtle, like a button class or button ID.
To make this decision easier, you can set up tracking for ‘all clicks’ first to help you identify what these differentiating factors are using GTM’s debug tool (more to follow).
There are two default click-related triggers in Tag Manager – ‘Click – All Elements’ and ‘Click – Just Links’. The difference between these is that ‘Click – All Elements’ tracks clicks on any element on a page, e.g. images or buttons, whereas ‘Click – Just Links’ tracks clicks on HTML links that use <a> tag only.
For this example, we will be using ‘Click – Just Links’. To set this up, you will need to create a test trigger that fires on ‘All Link Clicks’ so that your differentiating factors can be identified. So, here you would use the ‘Click – Just Links’ trigger.
Navigating to Triggers in the left-hand menu, select ‘New’ and choose the aforementioned trigger. Ensure this trigger fires on ‘All Clicks’ and is named appropriately. Save and close.
Using the Preview Debugger (Google Tag Assist)
The beauty of Google Tag Manager is that the platform enables you to preview the tracking you have set up. This means you can check that your setup is working as it should before you put it live. Google Tag Assist allows you to inspect what tags are firing and when. You can also have your Google Analytics Real Time ‘Events’ report open at the same time as using the Preview/Debug tool, allowing you to check you’re happy with the way events are translating into your GA property.
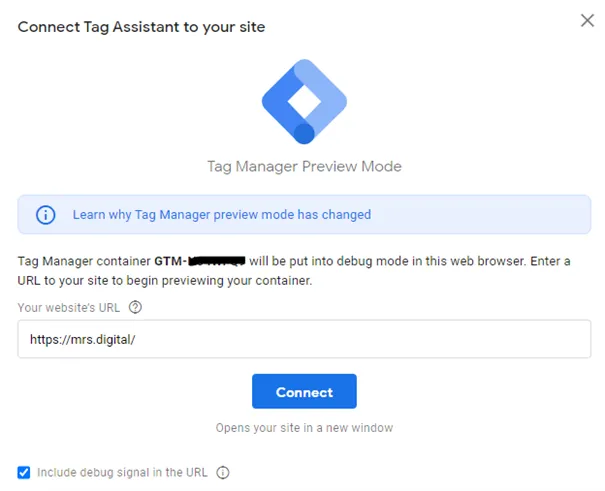
Now that you have your test trigger, you want to enter ‘Preview’ mode by clicking the preview button at the top right of your workspace. This will open Tag Assist and you will be greeted with the following box. Here, you need to type in your domain:
Once connected, your website will open in a new tab with a box in the bottom right corner stating ‘Tag Assist Connected’. Now, when you interact and move around on pages on your site, you can preview events firing in the debugger (in the previous tab).
The parts of Google Tag Assist you need to pay attention to are the ‘Tags’ and ‘Variables’ tabs. The ‘Tags’ panel shows you what tags have fired and what tags have not yet fired (tags to be explained further along). The ‘Variables’ tab, on the other hand, will show you information about variables in the selected event (e.g., a link click). This information will include the type of variable and the type of data returned – for instance the click URL value.
When testing clicks in Preview mode, make sure you hit ‘CTRL’ + click on any links you want to inspect. This will open the clicked link in a new window so that you don’t move away from the current page. As an example, by clicking the ‘Speak to us today’ link in one of our blog posts, this is what we can see under ‘Variables’.
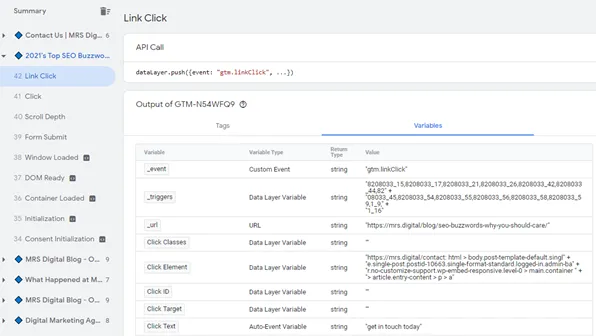
These variables give us a multitude of options to choose from when specifying particular links to track using variables later on.
Start Tracking Links Today
If you need help tracking link clicks, or any other tracking for that matter in Google Analytics, get in touch with the experts at MRS. We’ll help you gain the insight you need.